Rings
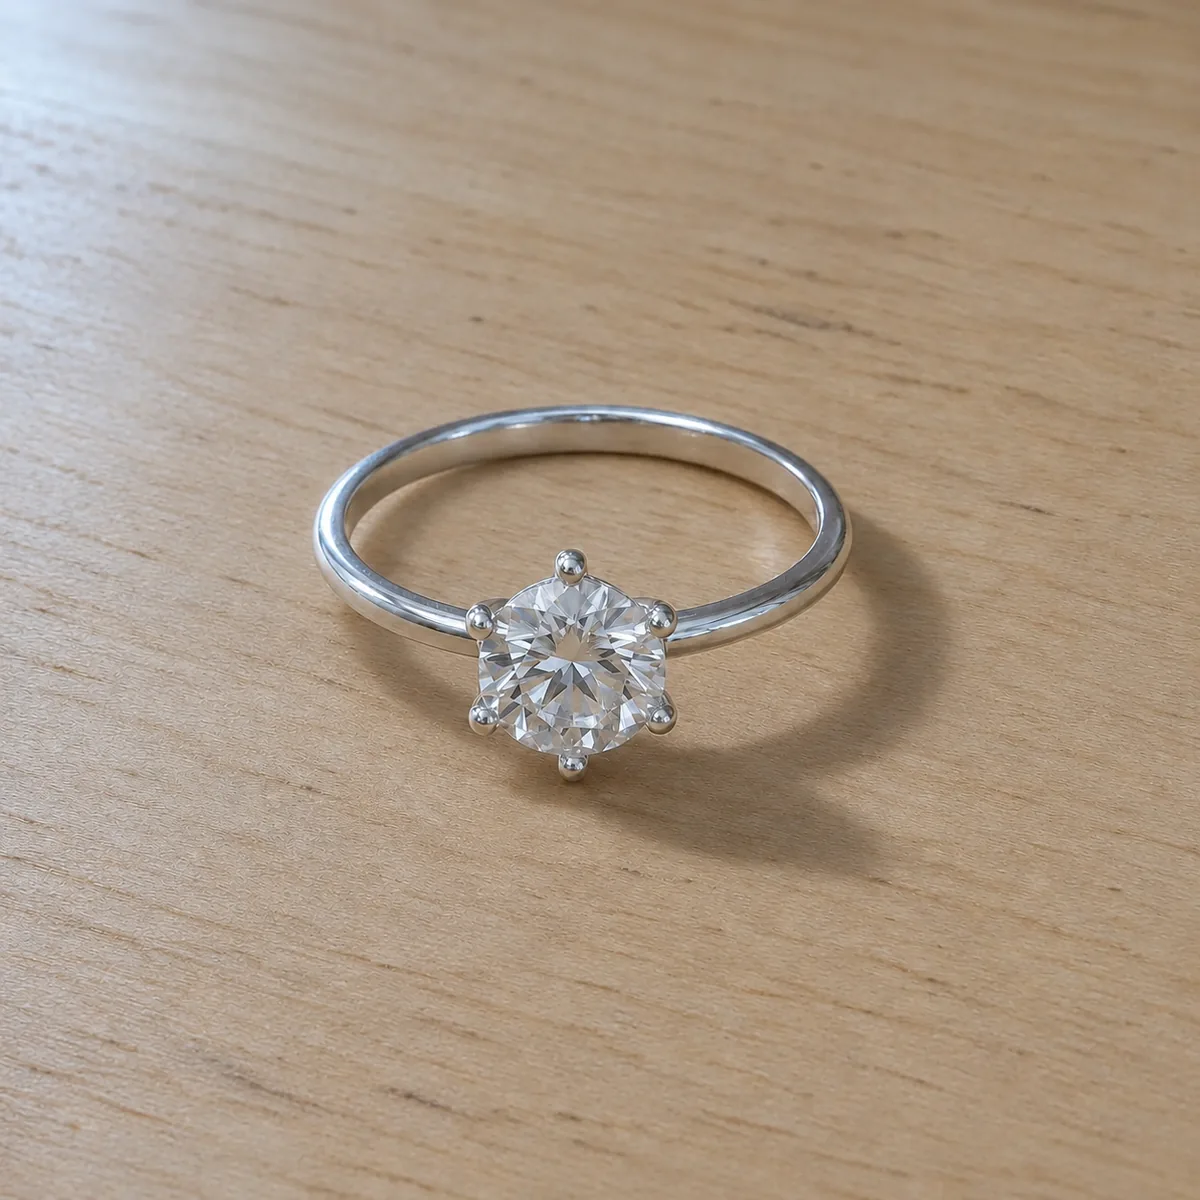
Shoot a three-quarter angle so the stone and band show together. Focus on the stone, and add a side view if the setting height matters.
Guide · Phone photography
You do not need a macro lens or a light box to sell jewelry online. A phone, a window and a few household items get you a sharp, honest photo, and that photo is what every AI tool works from.
Published · Updated · Image25 Jewelry Studio
Improve a jewelry photoTo photograph jewelry with your phone, shoot next to a window in indirect daylight, bounce light with a white card, steady the phone, lock focus and exposure on the piece, and avoid zoom and flash. Then fix light, dust or background with AI, and keep one unedited original.
01
Yes. Modern phone cameras resolve far more detail than an online listing can display. What usually goes wrong is not the camera but the setup: harsh light that turns metal into white streaks, a dark corner that adds noise, a hand that shakes at close range, or autofocus that locks onto the backdrop instead of the stone.
Jewelry is small, reflective and full of edges, so it punishes every one of those problems. The fix is to control light and stability, then tell the phone exactly what to focus on. None of it needs special equipment.
A good phone photo also matters after the shot. Every AI jewelry tool works from your photo as the identity of the piece. A sharp, evenly lit original gives the model accurate stones, prongs and chain links to keep; a blurry one forces it to guess.
02
Everything here costs little or nothing.
| Item | What it does | Tip |
|---|---|---|
| A window with indirect light | Soft, even light that shows metal and stones | Avoid direct sun; a thin curtain diffuses it |
| White card or paper | Bounces light into shadows on the dark side | Hold or prop it opposite the window |
| Plain backdrop | Keeps attention on the piece and gives clean edges | Use contrast: dark for silver, light gray for gold |
| Jewelry putty or a ring holder | Stands rings upright and holds earrings in place | Hide it behind the piece |
| Books or a small tripod | Holds the phone still at close range | Use the self-timer to avoid shake |
| Lint-free cloth and a blower brush | Removes fingerprints and dust before the shot | Clean the piece and the backdrop |
03
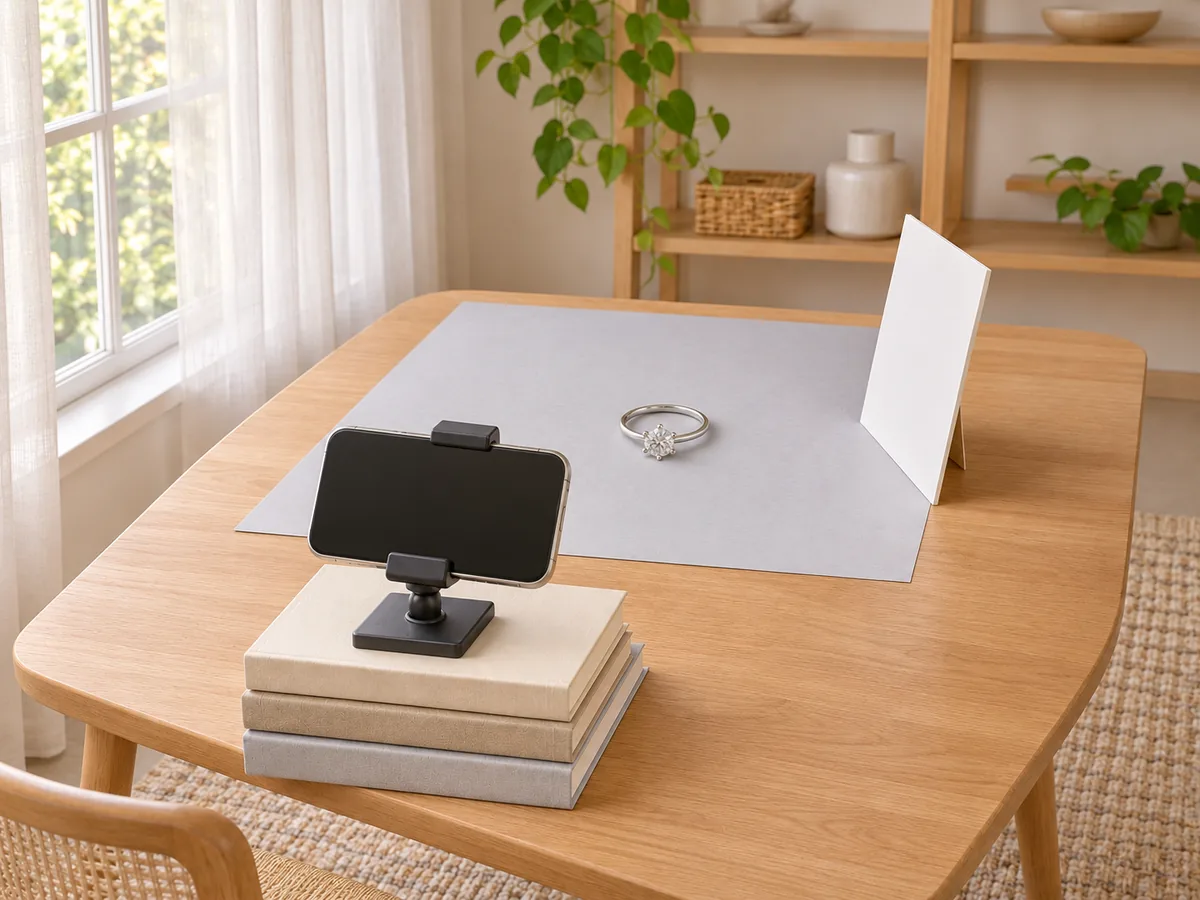
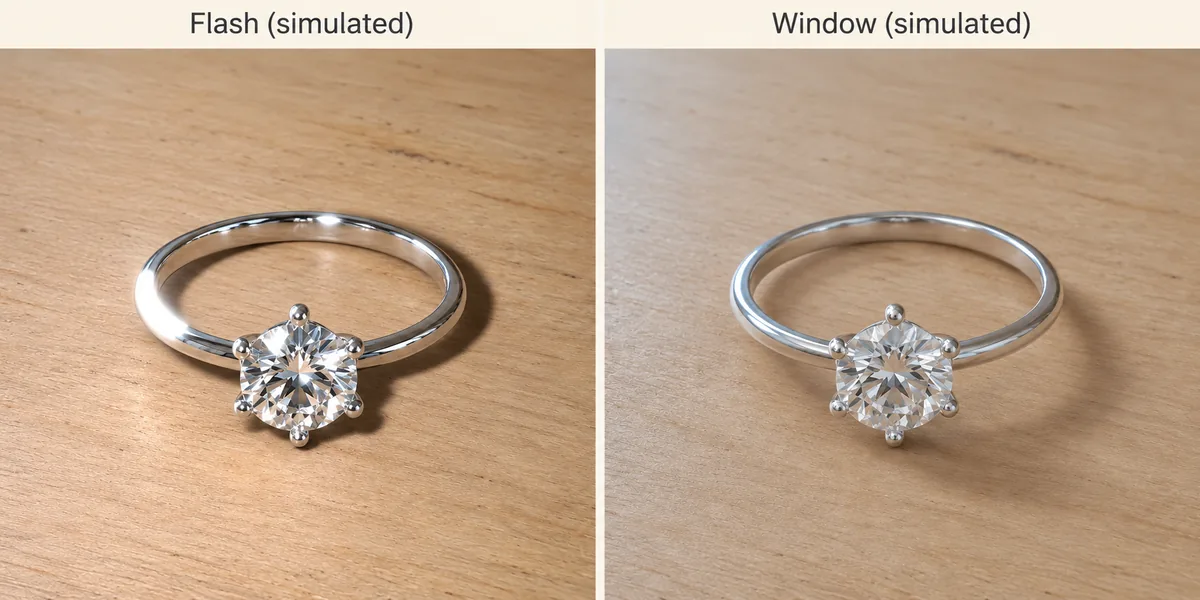
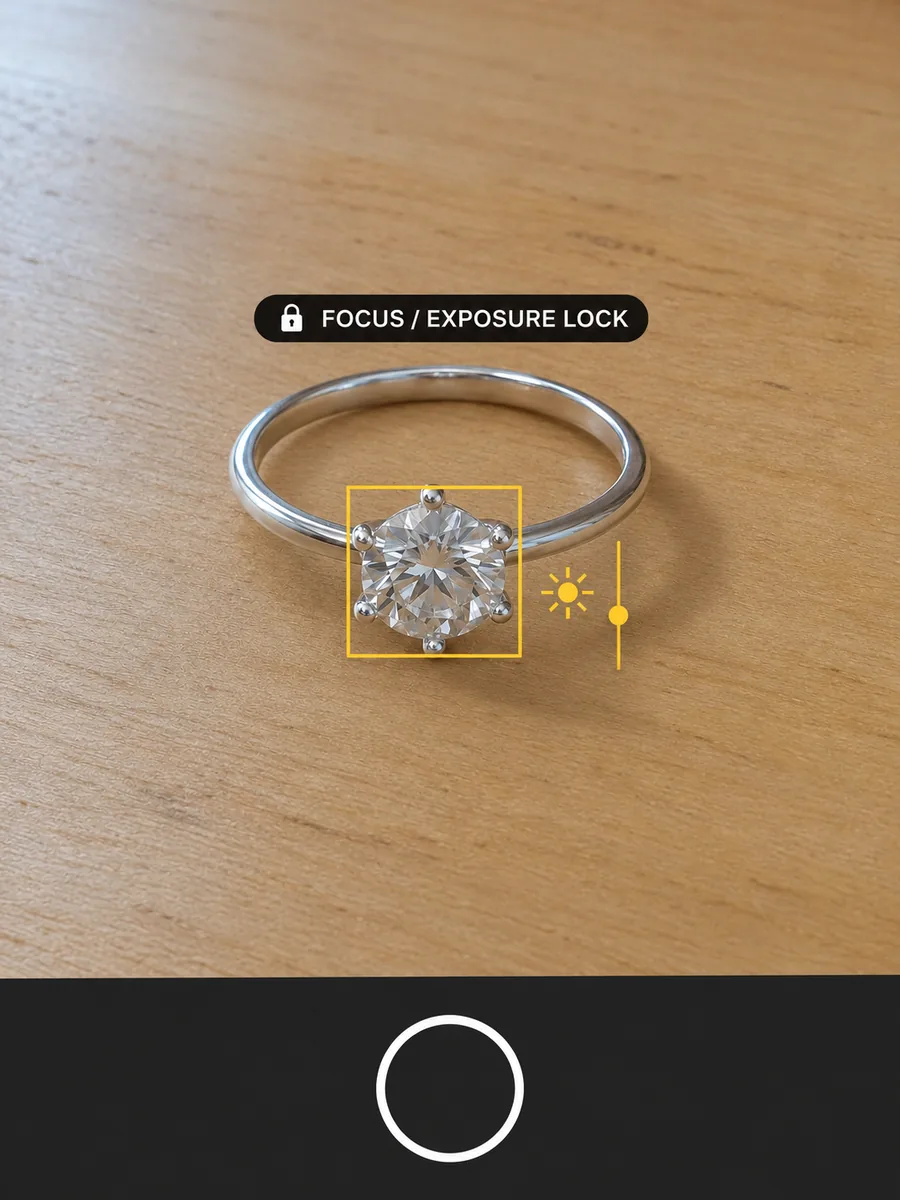
Arrange the light, bounce card and phone as shown below. Camera controls vary by phone.
04
Six steps from a clean piece to a usable original.
Wipe the jewelry with a lint-free cloth and use a blower brush on the backdrop. At close range every fingerprint and fiber shows, and it is easier to remove it now than later.
Place the backdrop a step or two from a window with indirect light. Put a white card opposite the window to lift the shadow side. Turn off overhead lights so colors stay consistent.
Stand rings upright with a little hidden putty, lay chains in a loose oval with the clasp visible, place earrings as a matched pair with one turned, and lay bracelets in a circle.
Rest the phone on books or a small tripod. Use the main lens or a built-in telephoto lens, and move closer rather than pinching to zoom. Leave some space around the piece.
Tap on the stone or the most detailed part and hold to lock focus and exposure. Drag the exposure slightly down if metal looks blown out. Use the self-timer so the tap does not shake the phone.
Shoot a few frames at each angle and pick the sharpest. Keep that original untouched; it is your record of the piece and, on some marketplaces, a required listing photo.
05
| Setting | Use | Why |
|---|---|---|
| Flash | Off | Flash creates hot spots and flattens facets |
| Digital zoom | Avoid | It crops and softens; move closer instead |
| Focus and exposure lock | On, tapped on the piece | Stops the phone refocusing on the backdrop |
| Exposure | Slightly darker than default | Protects highlights on polished metal |
| Portrait mode | Avoid for product shots | Artificial blur can cut into chains and edges |
| Beauty filters and effects | Off | They shift color and smooth real texture |
| Grid lines | On | Helps keep chains and bands level |
06
Shoot a three-quarter angle so the stone and band show together. Focus on the stone, and add a side view if the setting height matters.
Shoot straight down so the chain does not taper. Keep the clasp in frame, then take a second, closer photo of the pendant.
Keep both earrings the same distance from the lens so they look the same size. Turn one to show the post or hook.
Lay chains in a circle with the clasp at the top; stand bangles slightly tilted so the full outline shows.
07
Match the problem to the tool, and compare every result with your original.
| Problem in your photo | Tool | What it changes |
|---|---|---|
| Too dark, too warm or too blue | AI Jewelry Photo Editor, Light & color | Exposure and white balance only |
| Dust, lint or fingerprints on the surface | AI Jewelry Photo Editor, Dust & smudges | Loose particles around the piece |
| Glare hides the shape | AI Jewelry Photo Editor, Glare & hot spots | Blown-out reflections |
| Messy background | Jewelry White Background | Replaces the backdrop with pure white |
| Need a styled or lifestyle look | AI Jewelry Photography | Scene, surface and light |
| Need another angle or layout | Ring, necklace or earring photography | View and layout for that type |
08
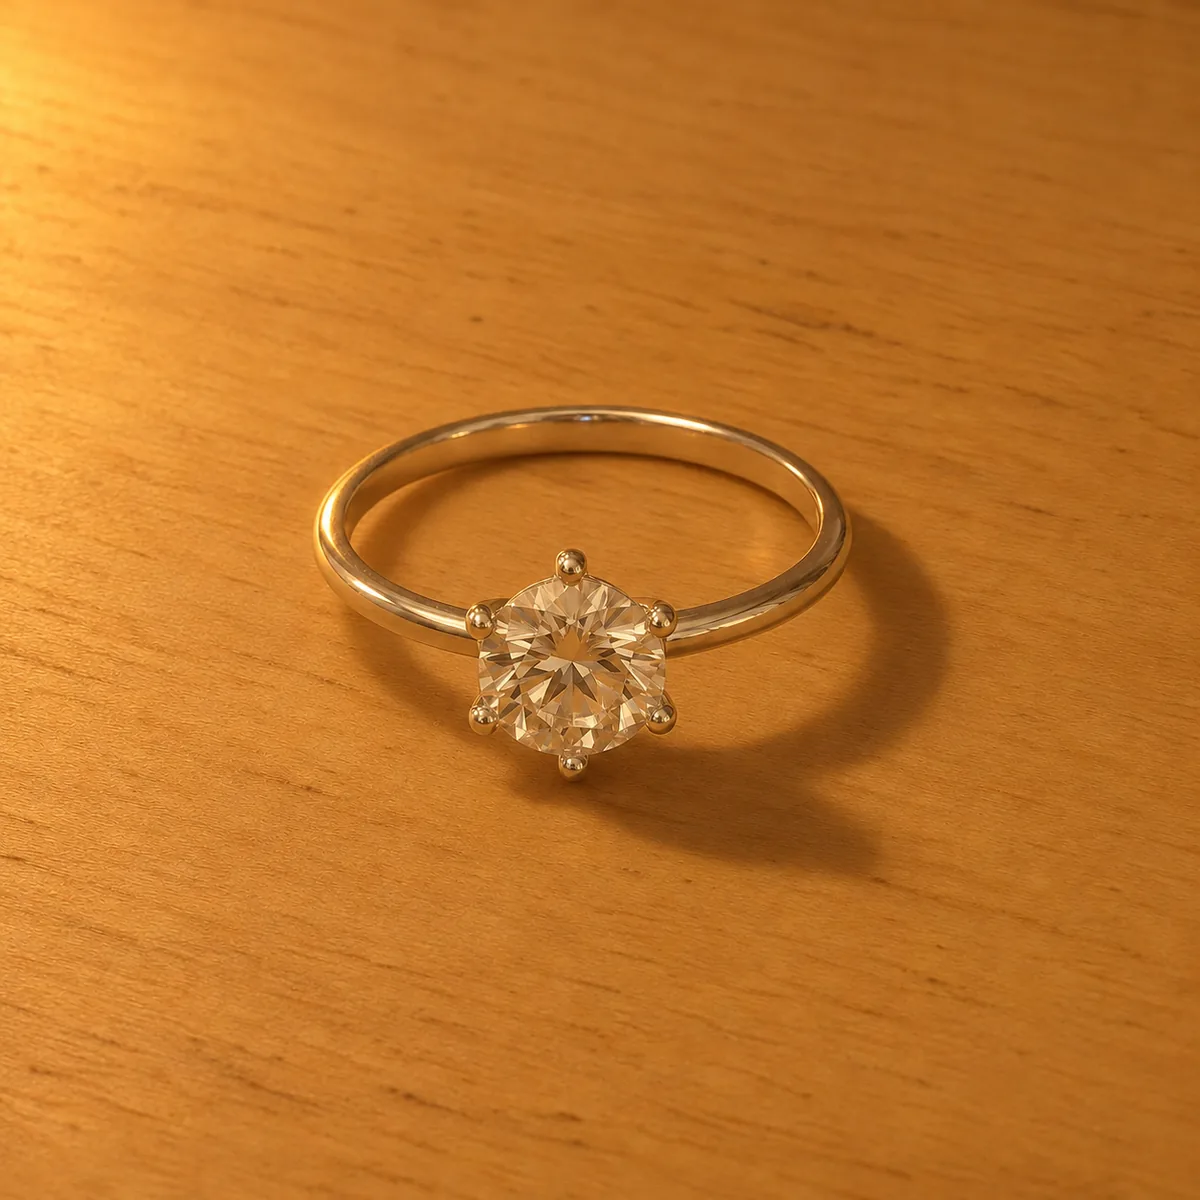
Compare the warm cast in the first image with the more neutral silver tone in the second. Check the stone, prongs and band when reviewing a color edit.
09
Before you publish
AI tools can fix light, dust, glare and backgrounds, but they can also change small stones, prongs, engraving and chain links. Compare every result with your original and the piece in hand, and never use edits to hide wear or flaws.
Keep at least one unedited photo of each piece. Some marketplaces, including Etsy since its October 2026 update, require one in most listings.
Questions
Use indirect window light, a white card to fill shadows, a plain backdrop and a steady phone. Tap and hold on the piece to lock focus and exposure, lower the exposure slightly, and use the self-timer. Avoid flash, digital zoom and filters.
Usually not for product shots. Portrait mode blurs the background with software, which can cut into chains, wire and the edges of stones. Use the main or telephoto lens in normal photo mode instead.
No. Indirect daylight from a window plus a white card gives soft, even light. A light box helps with consistency if you shoot many pieces, but it is not required for sharp, accurate photos.
Use narrow edits that fix the photo rather than the piece: exposure and color, dust on the surface, glare, or the background. Compare every result with your original, never remove real wear or flaws, and keep one unedited photo.
Most blur comes from hand shake at close range, low light or autofocus locking onto the backdrop. Rest the phone on something stable, shoot in daylight, tap to lock focus on the piece, and use the self-timer.
Upload JPEG, PNG or WebP. Many phones save HEIC by default; export or convert those photos to JPEG before uploading to the Jewelry Studio tools.
Upload your sharpest phone photo and fix light, dust or glare without changing the piece.
Open the photo editor